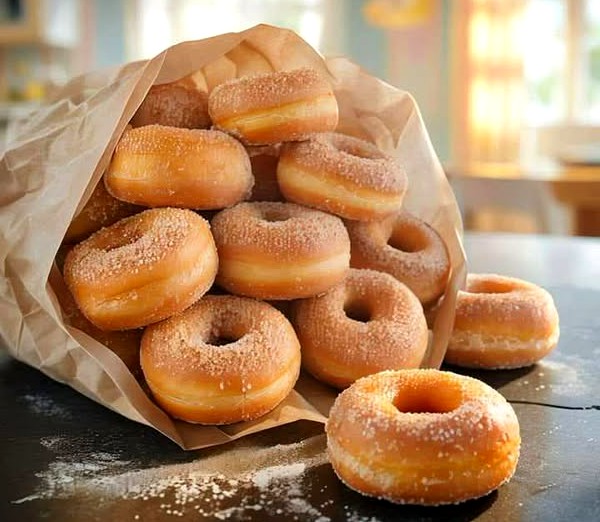
There’s something undeniably comforting about the smell of freshly fried doughnuts wafting through your kitchen. Soft on the inside, golden on the outside—this classic doughnut recipe is simple, satisfying, and absolutely delicious. Whether you like them plain, glazed, or filled, these doughnuts are sure to become a favorite.
Ingredients:
-
3 cups all-purpose flour
(Sifted, to ensure a light, fluffy texture) -
2 tablespoons unsalted butter
(Softened, for richness and flavor) -
7 grams (1 packet) active dry yeast
(This helps the dough rise and gives the doughnuts that soft, airy bite) -
5 tablespoons granulated sugar
(Adds sweetness and helps activate the yeast) -
1 cup warm milk
(Make sure it’s warm—not hot—to properly activate the yeast) -
A pinch of salt (optional)
(Balances the sweetness and enhances the flavor) -
Vegetable oil for frying
(Use a neutral oil like canola or sunflower for best results)
Instructions:
Step 1: Prepare the Yeast
Start by activating the yeast. In a small bowl or cup, pour in the warm milk (around 100°F or 38°C), then add 1 tablespoon of the sugar and the dry yeast. Stir gently and let it sit for 5 to 10 minutes. You’ll know it’s ready when it becomes frothy on top—this means the yeast is alive and working.
Step 2: Make the Dough
In a large mixing bowl, combine the sifted flour, remaining sugar, and a pinch of salt. Add the softened butter and mix it in with your fingers until the mixture feels crumbly. Next, pour in the activated yeast mixture and stir everything together until a sticky dough begins to form.
Step 3: Knead the Dough
Transfer the dough onto a clean, floured surface and knead it for about 8 to 10 minutes. You want the dough to become smooth, elastic, and only slightly tacky to the touch. If it’s too sticky, sprinkle in a little more flour—just a bit at a time.
Step 4: Let It Rise
Shape the dough into a ball and place it in a lightly greased bowl. Cover the bowl with a clean kitchen towel or plastic wrap. Let the dough rise in a warm, draft-free area for about 1 to 2 hours, or until it has doubled in size.
Step 5: Shape the Doughnuts
Once the dough has risen, punch it down gently to release the air. Roll it out on a floured surface to about ½ inch thickness. Use a doughnut cutter (or a round cookie cutter and a smaller one for the hole) to cut out doughnuts. Gather the scraps, re-roll, and cut again until all the dough is used.
Step 6: Second Rise
Place the cut-out doughnuts on a floured tray or parchment-lined baking sheet. Cover them loosely and let them rest for another 30 to 45 minutes. This second rise helps create that perfect light and fluffy texture.
Step 7: Fry the Doughnuts
Heat a deep pot of oil to 350°F (175°C). Carefully lower the doughnuts into the hot oil using a slotted spoon. Don’t overcrowd the pan—fry in batches. Cook each side for about 1 to 2 minutes, or until golden brown. Remove the doughnuts and drain on paper towels to absorb any excess oil.
Step 8: Add the Final Touch
While the doughnuts are still warm, you can toss them in granulated sugar, cinnamon sugar, or dip them in glaze or melted chocolate. If you want to fill them with jam, custard, or cream, let them cool first, then use a piping bag with a filling nozzle.
Serving Suggestions:
Serve your homemade doughnuts warm for the best experience. They’re perfect with a cup of coffee or hot chocolate, and they make a fantastic treat for breakfast, brunch, or dessert.
Tips for Perfect Doughnuts:
-
Warm milk, not hot! Too-hot milk can kill the yeast and prevent your dough from rising.
-
Don’t over-flour. Too much flour can make the doughnuts dense.
-
Use a thermometer when frying to maintain the right oil temperature.
-
Let them rise well. The longer and more patiently you let them rise, the softer they’ll be.
-
Eat fresh! Doughnuts are best enjoyed on the day they’re made.