
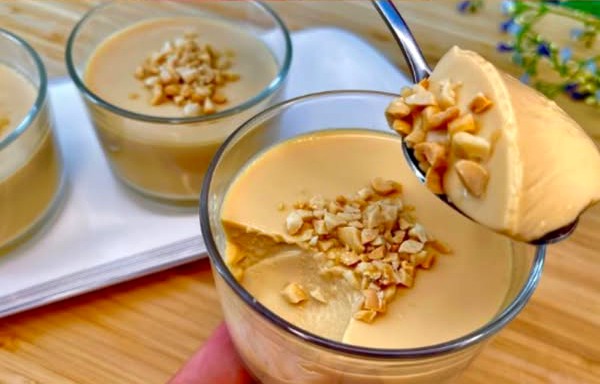
Creamy No-Bake Milk Pudding (Only 3 Ingredients!)
If you’re looking for a quick, comforting, and foolproof dessert, this No-Bake 3-Ingredient Milk Pudding is just the treat you need. Made with just a few pantry staples—milk, sugar, and eggs—this pudding is velvety, smooth, and lightly sweet. It’s the perfect no-fuss dessert for weeknights, holidays, or any time you’re craving something cozy and homemade.
The best part? You don’t need any special tools or baking experience to whip it up. It’s naturally gluten-free, and you can easily customize it with your favorite flavorings and toppings.
🧾 Ingredients
-
2 cups milk (500ml) – Whole milk gives the creamiest texture, but low-fat or plant-based milk alternatives like oat or almond milk can also work.
-
1/3 cup sugar (70g) – You can adjust this to taste.
-
2 large eggs
-
(Optional) 1 teaspoon vanilla extract – Adds a warm, sweet aroma and enhances the overall flavor.
-
(Optional garnish) Chopped nuts, caramel sauce, fresh fruit, or cinnamon
🍮 Instructions
1. Whisk the base
Start by cracking the eggs into a medium saucepan off the heat. Add the sugar and whisk until the mixture becomes smooth and a little foamy. This step helps dissolve the sugar and blend the eggs evenly, preventing clumps during cooking.
2. Add the milk
Gradually pour in the milk while whisking continuously. This helps incorporate the eggs and sugar smoothly with the milk, creating a lump-free base for your pudding.
3. Cook gently
Place the saucepan over medium-low heat. Stir constantly with a heatproof spatula or a wooden spoon, scraping the bottom and sides of the pan as you go. The pudding will start to thicken after about 6 to 10 minutes. Be patient—don’t rush this step or turn up the heat, as that can cause the eggs to curdle.
🔥 Tip: You’re aiming for a texture that lightly coats the back of a spoon. If you draw a line through the pudding on the spoon and it holds its shape, it’s ready.
4. Flavor it (optional)
Once thickened, remove the saucepan from the heat and stir in the vanilla extract, if using. The pudding will continue to thicken slightly as it cools.
5. Cool and set
Pour the hot pudding into individual serving cups, small bowls, or ramekins. Let them cool to room temperature, then transfer to the refrigerator. Chill for at least 2 to 3 hours, or until fully set and cool.
6. Serve and enjoy
Before serving, feel free to top the pudding with a handful of chopped nuts, a swirl of caramel sauce, a dusting of cinnamon, or a few slices of fresh fruit. Or, enjoy it as is—it’s delicious either way!
📝 Recipe Notes & Tips
-
Make it dairy-free: Swap the milk with coconut milk, almond milk, or any non-dairy alternative.
-
Make it richer: For extra indulgence, replace ½ cup of milk with heavy cream.
-
Avoid curdling: Always cook over low to medium-low heat and stir constantly. If you’re nervous, use a double boiler to gently heat the mixture.
-
Add texture: Stir in shredded coconut, rice, or crumbled biscuits just before chilling for a fun twist.
🍴 Serving Suggestions
This pudding pairs beautifully with:
-
A sprinkle of toasted almonds or crushed pistachios
-
A drizzle of honey or maple syrup
-
Seasonal fruits like berries, mango, or banana slices
-
A dusting of cocoa powder or instant coffee granules for a mocha twist
❄️ Storage
Store any leftover pudding in the fridge, covered, for up to 3 days. You can also cover it with plastic wrap directly on the surface of the pudding to prevent a skin from forming.